You will need to supply:
- lumber
- screws
- stain and brushes to apply and cleaner for brushes
- tools for assembly
- brackets to attach case to wall
- brackets to attach pieces together if "L" shaped
Lumber
The wood I use most often is simply the pine you get from most lumber yards. I use 2x8 or 2x10 in 8' lengths for the bookcases (the choice is yours) and I use 1x6 in 8' lengths for video, video game and CD cases. If you can't get 8' lengths in your vehicle, let me know and I'll figure out the cutting instructions using 6' lengths. (For anyone using metric measurements, I can do that as well.)
Screws
I've found what works best are drywall screws. 2 1/2" coarse thread for the bookcases and 1 5/8" coarse thread for the other cases.
Stain
The nice thing about pine is that it takes almost any color stain rather nicely. The choice of colors and finishes is up to you. You'll also want to remember to provide some sort of drop cloth or plastic on the floor so the stain does not go where it's not supposed to.
Tools for Assembly
You'll need a saw. A chop saw or table saw is the best, but it can be done by hand although it will take a long time, especially if you have a big bookcase. An electric or battery-powered drill with appropriate bit works best, although a screwdriver can be used in place of a drill, although again, that will take much longer. It's best to have a screwdriver on hand in case your drill won't fit in some of the places.
Brackets
I strongly recommend screwing your bookcase to the wall at a stud. Especially for the book cases because they are heavy. If they were to tip over, they could seriously injure a child or pet. Or even an adult. I use L brackets and attach them to the underside of one of the top shelves. The location will be up to you to determine based on where the studs are in your home. The blueprints will have a diagram of how to attach the bracket to the bookcase.
You may also need brackets to connect sections of the cases if they go around a corner. Again, L brackets will do the trick, although for this part I use ones with three holes on each leg in a triangular pattern.
I have provided some pictures of a bookcase and video case I built for myself and also some examples of assembly instructions and cutting instructions.
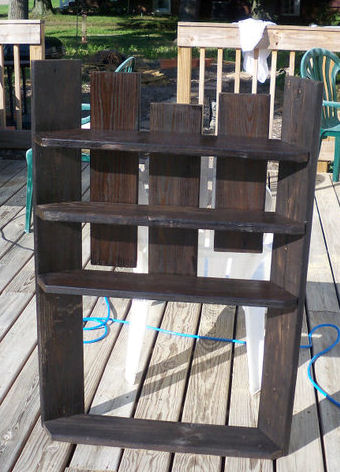
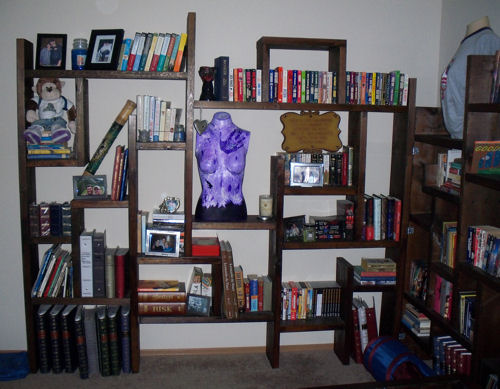 | This is one part of the bookcase. It stands about 6'-8" at the tallest. |
| This is the other side of the bookcase. It is L-shaped. | 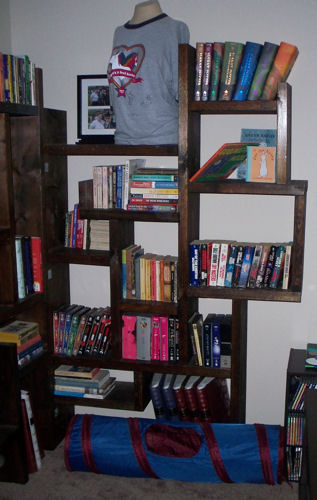 |
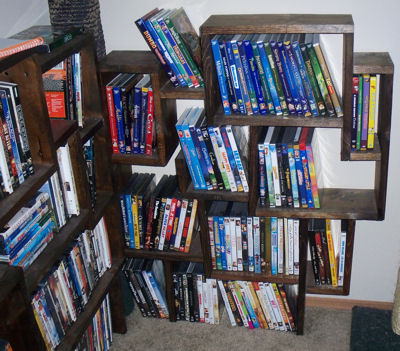
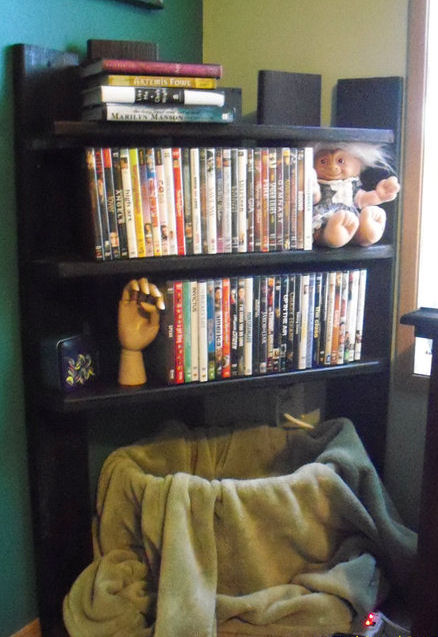
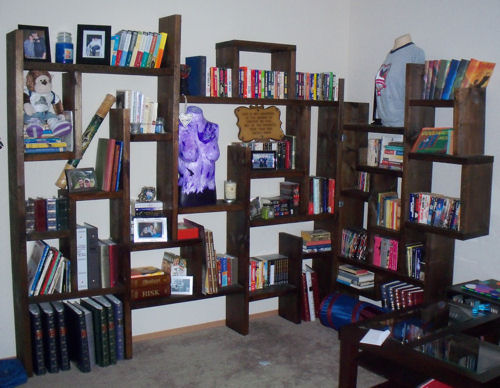 | This is the assembled bookcase. |
| This is one part of the video case. It stands about 3'-6" at the tallest. | 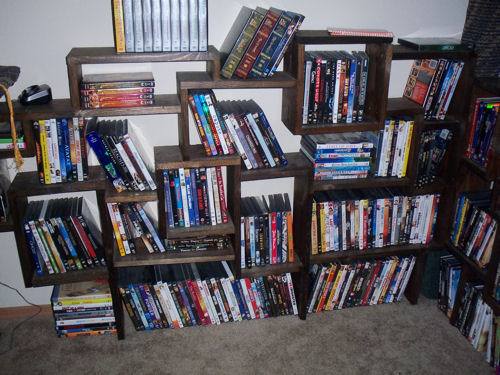 |
 | This is the other side of the video case. It too is L-shaped. |
| This is the assembled video case. | 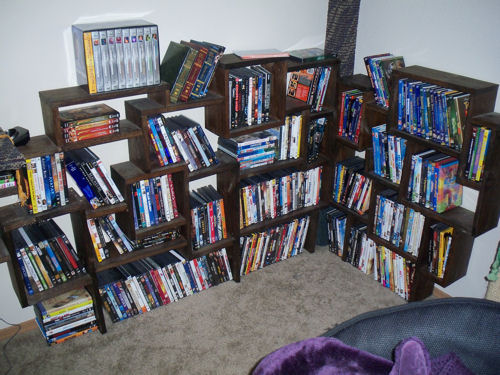 |
 | This is a corner bookcase I built for our bedroom. It's very simple and very cheap to make. It stands about 3'-6" at the tallest. |
| This is another view of the corner bookcase before it's put into place. | 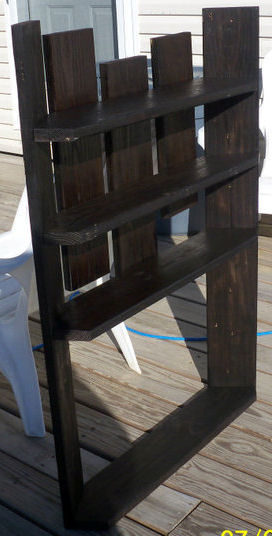 |
 | This is the corner bookcase in place. |
| This is showing how snuggly it fits against the wall. Because this is so small, it's not screwed to the wall. | 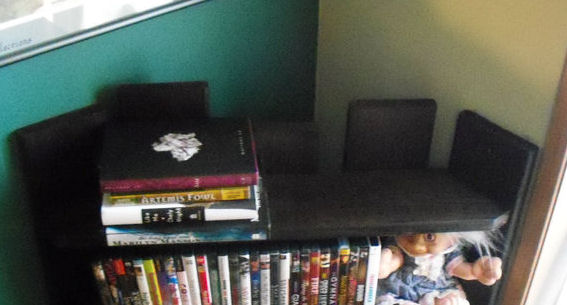 |
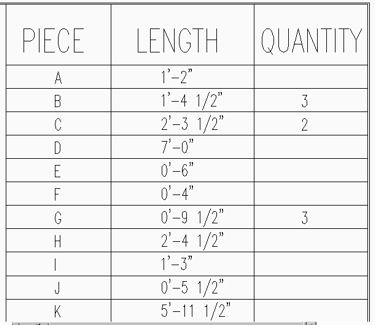 | This shows part a list of the pieces you'll need. |
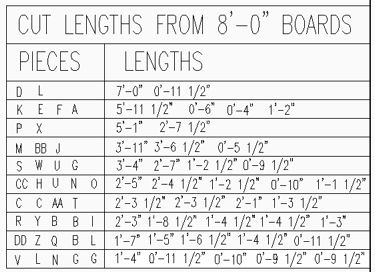 | This shows part of the cut list. This is a list of the pieces you'll cut from each piece of lumber. You'll notice that on the first line, there are two letters in one column and two lengths in the other. The first letter and first length indicate that piece D is 7'-0" long. The second letter and second length indicate that piece L is 0'-11 1/2" long. You should label each piece as you cut it with the mark shown. I use pencil and I put it on the edge of the board so that when I assemble it, you can't see the mark. |
 This shows the completely assembled bookcase with dimensions and piece marks. (You will get an actual 24"x36" blueprint. This is how it shows up on my autocad program and I opted not to spend the time changing it to a white background with dark blue lines.) As a rule of thumb, a 50 sq. ft. bookcase will take about five blueprints. |
|
 | This shows partial assembly list. Each step is shown in detail in the order they are presented on this list. |
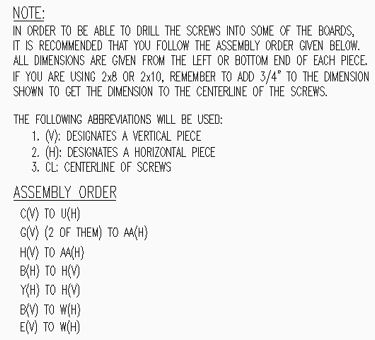
 | This shows the first step. Note that the first step from the assembly list is repeated at the bottom of the picture. Also note that the pieces are labeled and the piece you are screwing to the "main" piece is cross-hatched. In this step, horizontal piece "U" is the "main" piece. It also indicates which side to screw from and how far from the end of the main piece to the edge of the piece being screwed to it. Remember to add half the thickness of the wood to get to the centerline of the screws. (Measure the thickness of the wood because a 2x10 is not 2" thick nor 10" wide.) |
 | Again, the second step of the assembly list is repeated at the bottom. The pieces being attached to the "main" piece (in this step, piece "AA" is the "main" piece) are shown cross-hatched. |
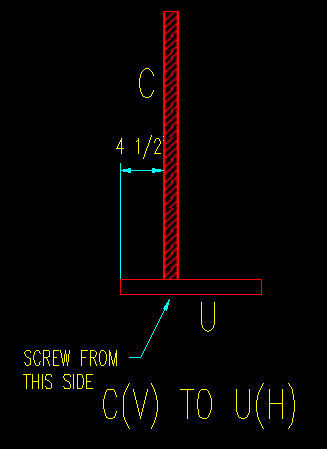
 | The third step of the assembly list is repeated at the bottom. The pieces being attached are shown cross-hatched. Note that the pieces already attached in step 2 are shown in place. |
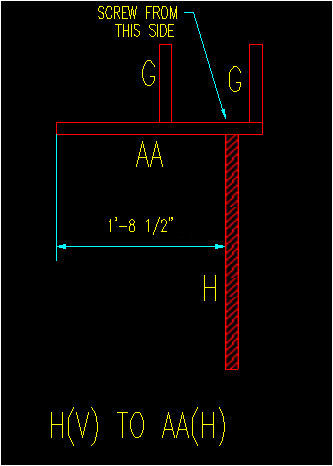
 | The fourth step of the assembly list is repeated at the bottom. The pieces being attached are shown cross-hatched. Note that the pieces already attached in steps 2 and 3 are shown in place. Also note that if you attached piece "B" to piece "H" and put that onto piece "AA" before attaching the two piece "G"s, you'd not have enough room to get your drill positioned to attach the piece "G" at the end of piece "AA". So please don't jump ahead and do sections that look easier because I've already figured out where the problems might arise during assembly. |
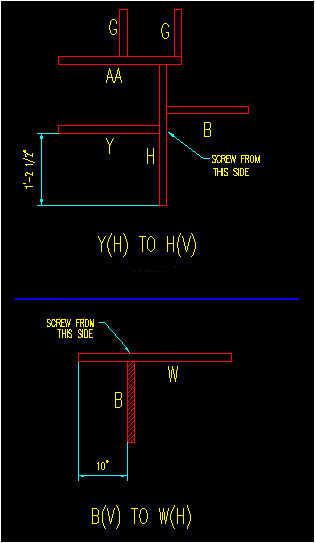 | Note here the line between the fifth and sixth steps. This line on the blueprint indicates that you're done with the assembled section you were working on and are going to be starting over with new pieces of wood. In these first seven steps, there was a blue line after step one and another here between steps five and six. Step five is above the blue line and step six is below it. |
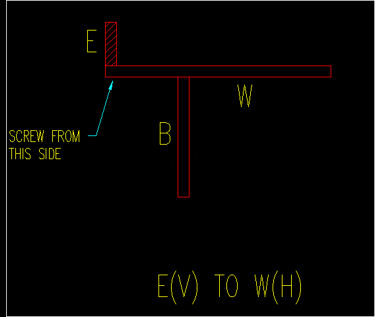 | The seventh step of the assembly list is repeated at the bottom. The pieces being attached are shown cross-hatched. |
| The price of the blueprints depends on the square footage of the case, based on the max height of the piece times the maximum width.
If you have any questions or want to place an order, please email me and let me know the approximate dimensions and any special considerations (like "can you make it shaped like a tree?" And the answer is yes, to a certain extent.) After I have the bookcase designed, I will email you a graphic similar to the one above of the fully assembled bookcase but without the dimensions. This will enable you to get an idea of what it will look like. If you want to make minor changes, let me know and I'll make them for you. Once you're satisfied, I will send you a request for payment from PayPal. Once the money is in my account, I will send you the blueprints priority mail with delivery confirmation. If something happens to the blueprints after they reach you (which is why I use delivery confirmation), simply email me and I'll send you a second set for $6.00 a sheet. (I don't have a the ability to print blueprints from my computer and that's what I get charged to print them out.) If you only need a specific sheet or two, I'll be more than happy to just print out those couple sheets. If you want them re-sent priority, please include an extra $5.00. I will send you the request for money through PayPal and after I receive it, I will print the copies and get them mailed to you the next business day. |